


A well-structured registration process is essential for seamless event management. With idloom's custom registration status feature, you can create unique statuses that align with your workflow, ensuring clear attendee tracking and a more efficient event management experience.
Why custom registration statuses are ideal for advanced attendee management
Managing attendee registrations efficiently can make or break an event. With idloom’s custom registration statuses, you eliminate manual tracking, reduce administrative workload, and gain full visibility over attendee progress. Whether you need to approve attendees, automate confirmations, or segment participants based on ticket types, this feature puts you in control.
How to set up custom registration statuses
idloom allows you to create and manage custom registration statuses at the profile level, making them available for all future events without the need for reconfiguration.
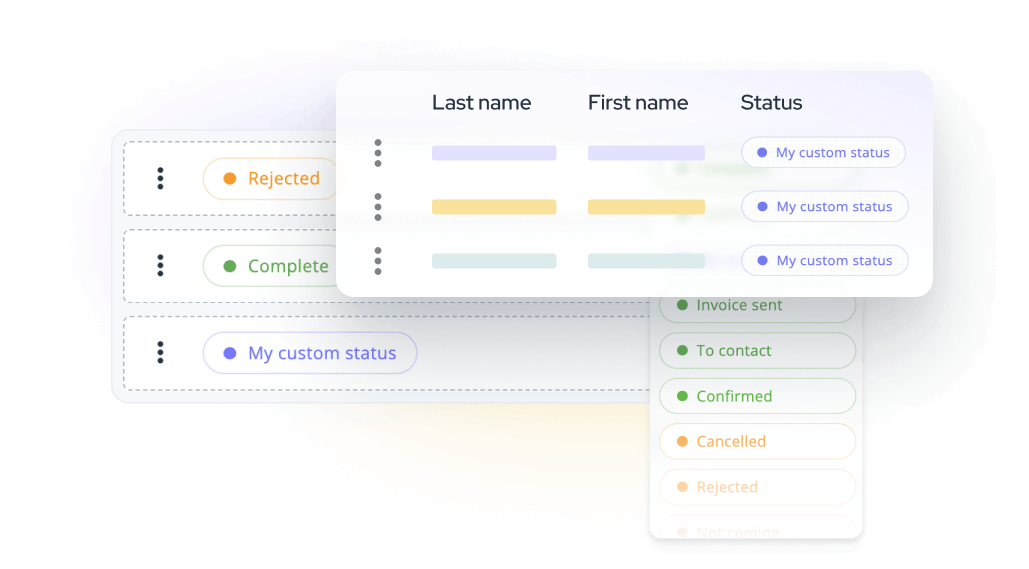
There are three types of registration statuses: Pending, Attending, and Not Attending.
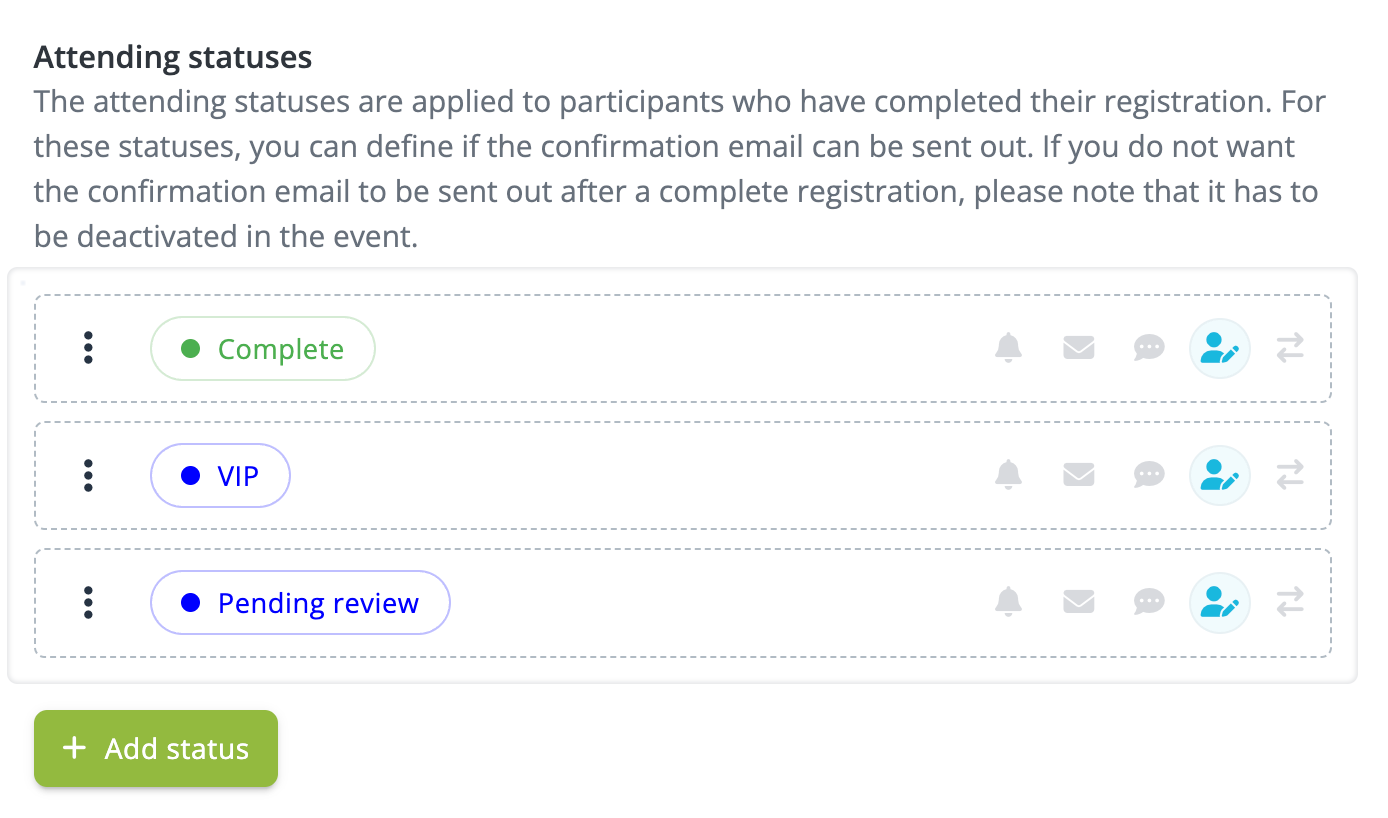
You can create new statuses within the Attending and Not Attending categories, set up specific actions, and configure tailored communications. Pending statuses, however, have a specific role within registration management, which is why you can only customize their color and label.
A detailed explanation of each status type and its utility is displayed within the registration statuses page in your Profile > Events Settings > Registration Statuses.
For further information on our default statuses click here.
Automate registration status updates: flexibility or full automation
Event organizers can now define which registration statuses unlock the ability for attendees to edit their registration. For example, if an attendee has the status "Need Approval," they can update their registration if this option is enabled.
Additionally, when an attendee modifies their registration, they can now automatically inherit a new status based on the ticket type they select or the default event registration status—according to the conditions set by the organizer (yes, you can easily link specific registration statuses to your categories / ticket types within your event).
Organizers can choose to keep manual control over status updates or fully automate the process. This flexibility allows for a tailored approach based on event requirements, reducing workload while maintaining oversight. By automating status updates, attendee management becomes more efficient and seamless.
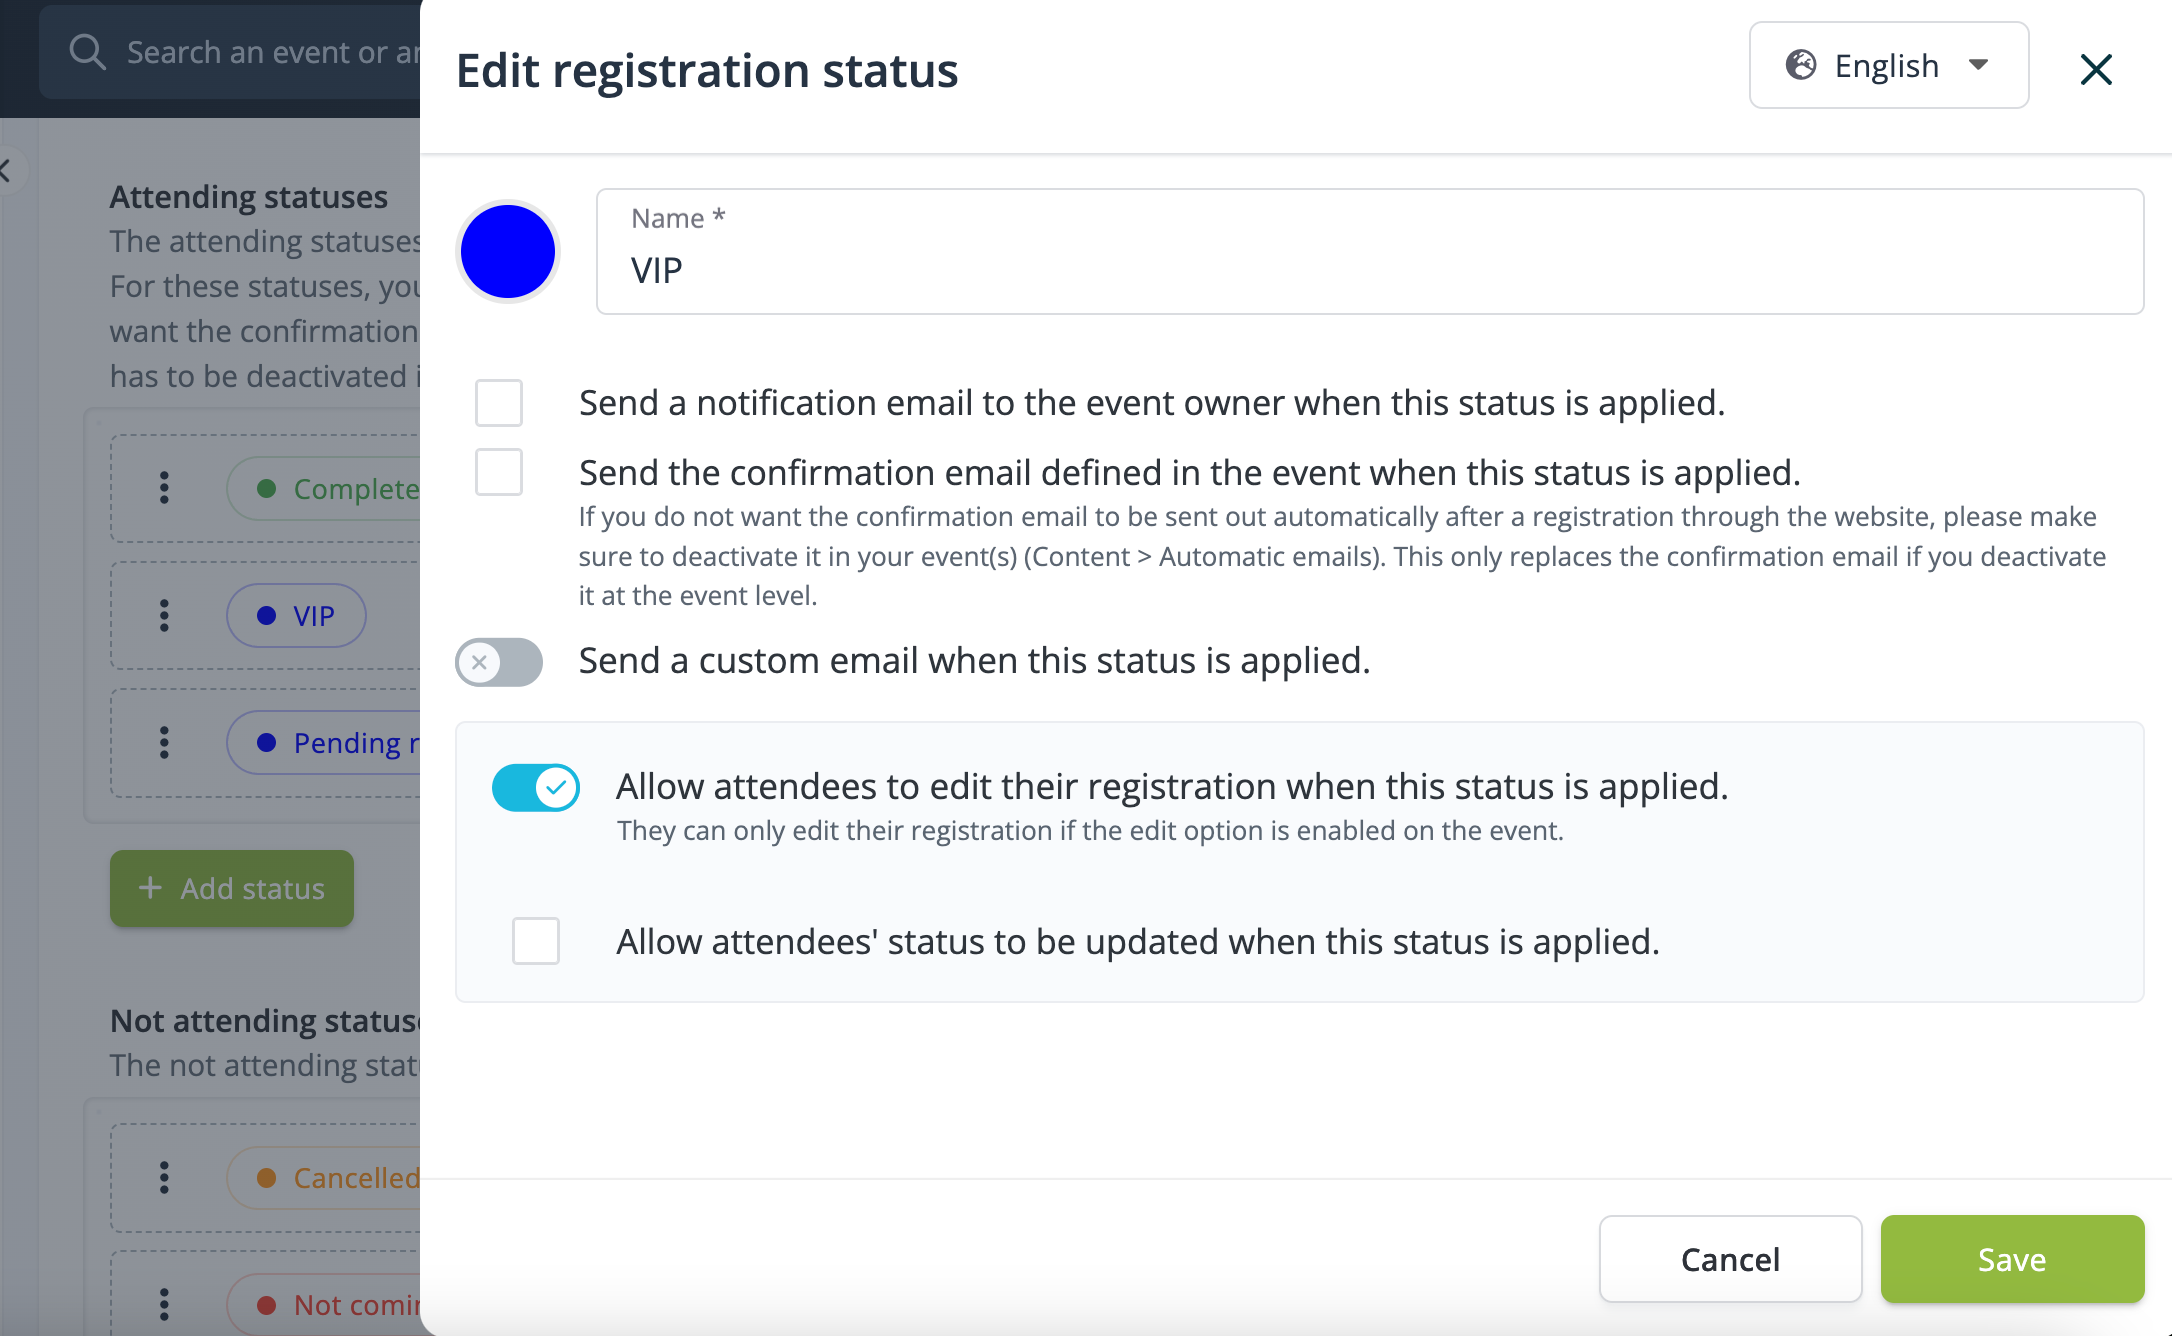
For events with international attendees, idloom allows you to add translations for all statuses. Simply select the country button in the status editor to input translations for different languages.
Again, these actions and settings can all be set up within Profile > Event Settings > Registration Statuses > Edit a status.
To summarize, setting up your attendee registration process is a two-step approach. First, at the profile level, you establish the foundations—creating statuses, defining actions, default settings like your default registration status and setting up tailored communication. Then, within each event, you refine these configurations to match its specific requirements.
Use case 1: streamlining registration with approval workflows
If your event requires manual approval before confirming attendees, a structured approval system helps you control registrations, track attendee progress, and automate communication. With custom registration statuses, you can set up a workflow where registrations start in a pending state, get reviewed by organizers, and move to an approved or rejected status.
Here’s how it works:
-
An attendee registers for the event and enters a pending approval status. They receive an email confirming that their registration is complete and will be reviewed.
-
The event organizer is notified of the new registration and can review and approve or reject the attendee from the backend.
-
Once approved, the attendee receives a confirmation email indicating their confirmed status, which remains unchanged even if they update their registration details.
This system ensures that organizers have full control over approvals while maintaining clear and consistent communication with attendees.
Here’s how to configure it:
- Create your approval workflow
- Define a pending status (e.g., "Pending Review") for new registrations awaiting approval.
- Create an approved status (e.g., "Confirmed") for attendees whose registrations are accepted.
- Add a rejected status (e.g., "Not Approved") for attendees who do not meet the event’s requirements.
- Decide how pending registrations affect availability
- If registrations in "Pending Review" should reserve a spot in the event capacity, add this status to the Attending list.
- If they shouldn’t count toward available spots until approved, add it to the Not Attending list.
- Set the default status for new registrations
- Assign "Pending Review" as the default status at the profile or event level, ensuring that every new registration enters the approval process automatically.
- Customize Notifications
- Enable custom email templates for the "Pending Review," "Confirmed," and "Not Approved" statuses. Options include QR codes, registration summaries, and event details, allowing you to tailor communication to each stage of the approval process.
- Assign Event Owner
- Specify the event owner in General > Essentials to ensure they receive notifications for pending registrations.
To avoid sending unintended confirmation emails, deactivate the automatic confirmation email in the event settings. Navigate to your event's settings and go to Content > Automatic Emails > Settings to make this adjustment.
This setup provides an efficient, controlled registration flow, helping you manage approvals while maintaining accurate stock counts.
Use case 2: Automating confirmation for VIPs and special categories
Beyond automating confirmations for VIPs, idloom allows you to link specific custom registration statuses to different categories and ticket types within each event. This provides even greater flexibility in managing your attendees by ensuring that different registration types automatically receive the appropriate status. Instead of manual review, you can automate their confirmation by linking VIP attendees to a custom status like "VIP".
Here’s how to set it up:
Link status to categories and ticket types
-
Navigate to categories & options in your event settings.
-
Assign the "VIP" status as the default for the corresponding ticket category.
-
Note: Only attending statuses can be linked to categories.

This setup ensures VIPs and other priority attendees receive a specially tailored communication and follow a different workflow, while other registrants continue through the standard process.
Gain full control over attendee management—from approvals to automated confirmations. These tools help streamline workflows, minimize manual effort, and enhance the overall registration process.
Need help? Our support team is ready to assist you.
The idloom team